CDFA Compliance Documentation

Operational Management & Sanitation Control Plan

A compliance overview for state food regulators, health department personnel, and host-location management.

NSF/ANSI-25 Certified 72-Hour Sanitation Cycles TARS Temperature Monitoring Certified by Intertek
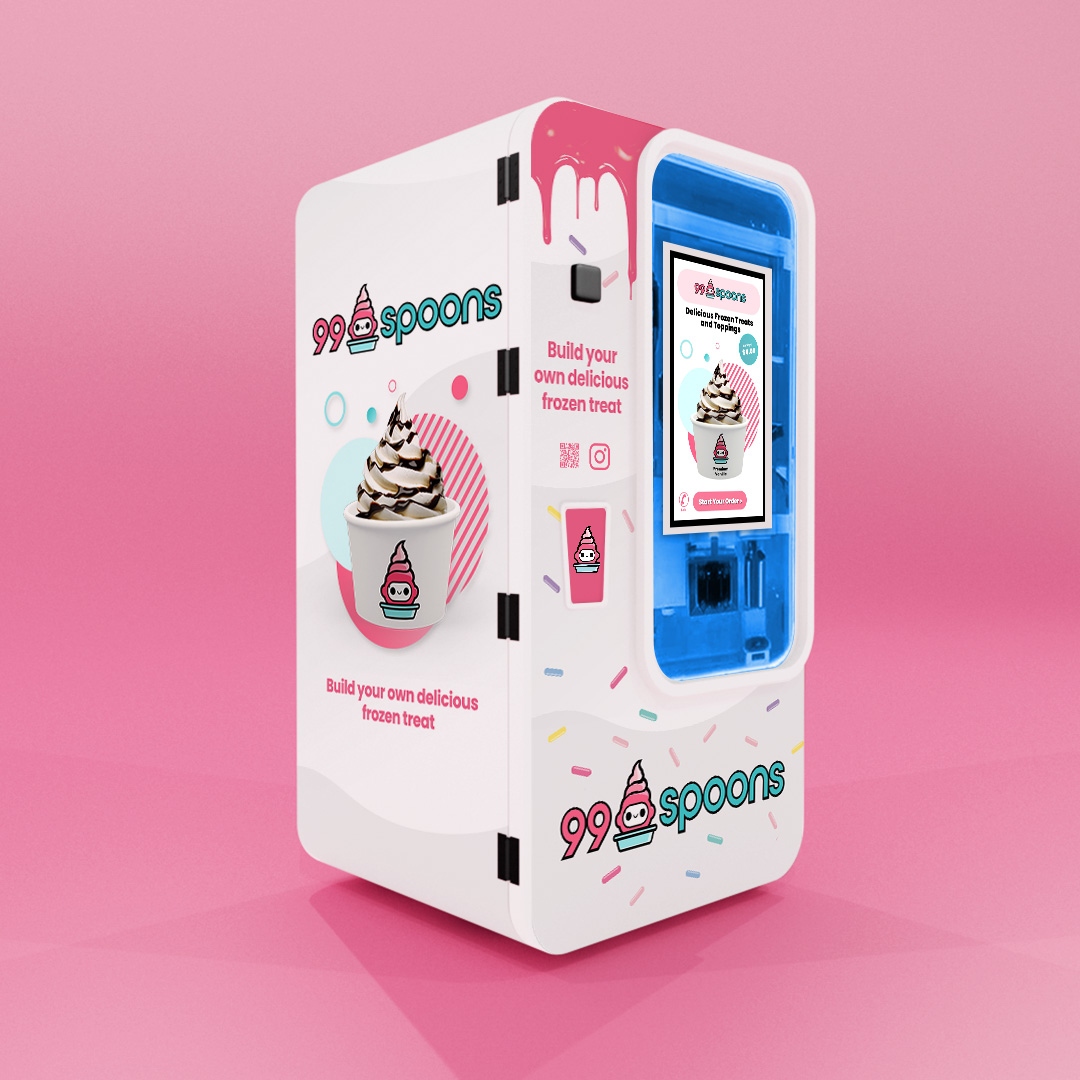
99 Spoons kiosk

Overview

Sanitation Protocol Overview

The 99 Spoons kiosk employs a hybrid sanitation approach combining Clean-in-Place (CIP) treatment of fixed internal components with manual disassembly and cleaning of removable food-contact parts.

Hybrid Sanitation

Clean-in-Place (CIP) treatment of fixed internal components combined with manual disassembly and cleaning of removable food-contact parts.

72-Hour Cycle

Each California kiosk undergoes a complete sanitation cycle every 3 days, including system flushing, full cleaning, ingredient replenishment, and operational inspection.

TARS Monitoring

The integrated Temperature Alert Reporting System (TARS) provides continuous operational telemetry and temperature monitoring between service visits.

Stera-Sheen Sanitizer

99 Spoons recommends Purdy Stera-Sheen Green Label Sanitizer. Dilution ratios, contact times, and rinse procedures follow manufacturer specifications.

Written Sanitation Logs

Operators maintain documentation of every service event, recording date, time, and servicing personnel for full traceability and regulatory review.

NSF/ANSI-25 Certified

The kiosk equipment is certified by Intertek to NSF/ANSI-25 standards, confirming compliance with recognized food equipment sanitation requirements.


Sanitation Controls

Cleaning Frequency and Sanitation Controls

72-Hour Cycle

Each California kiosk undergoes a complete sanitation cycle every 3 days, including system flushing, full cleaning, ingredient replenishment, and operational inspection.

Written Sanitation Logs

Operators maintain documentation of every service event, recording date, time, and servicing personnel for full traceability and regulatory review.

TARS Monitoring

The integrated Temperature Alert Reporting System (TARS) provides continuous operational telemetry and temperature monitoring between service visits.

Control Area Standard Detail Status
Cleaning Frequency Every 3 days Standard cleaning interval. If product testing, inspection results, or regulatory guidance requires a more frequent schedule, the operator shall comply accordingly. ACTIVE
Sanitizer Stera-Sheen Green Label 1 oz per 2.5 gallons of water · ~200 ppm quat · Verified with quaternary ammonium test strips (200–400 ppm acceptable range) VERIFIED
Contact Time Minimum 2 minutes Sanitizer circulated for minimum 2 minutes through all internal dispensing pathways. Applied to all removable components for 2-minute contact time. DOCUMENTED
Wash Temperature Lukewarm — Max 110°F Three-compartment sink with Stera-Sheen Green Label Sanitizer or equivalent food-equipment approved detergent at manufacturer-recommended concentration ACTIVE
Temperature Monitoring Continuous (TARS) Continuous operational telemetry and temperature monitoring between service visits AUTOMATED
Certification NSF/ANSI-25 Equipment certified by Intertek to NSF/ANSI-25 standards, confirming compliance with recognized food equipment sanitation requirements CERTIFIED

SSOP

Sanitation Standard Operating Procedure (SSOP) — 99 Spoons

Step-by-step procedure for every service visit, incorporating all regulatory feedback from CDFA and county health authorities. Steps A through I cover employee hygiene, ingredient verification, drain & rinse, full disassembly, O-ring removal and inspection, three-compartment sink cleaning, sanitizer concentration verification (test strips BEFORE sanitizing), food-grade lubrication, reassembly, in-machine sanitization, return to service, and the completed food safety checklist.

Sequence overview: Pre-service check → Drain product → Rinse → Disassemble → Remove O-rings/gaskets → Hand clean → Rinse (remove detergent) → Verify sanitizer concentration (test strip BEFORE sanitizing) → Sanitize (2 min contact) → Drain completely → Apply food-grade lubricant to O-rings & moving parts → Reassemble → Return to service → Document.

A

Pre-Service Food Safety Check

Complete before any cleaning begins. This step documents operator readiness and product integrity.

  • Operator washes hands thoroughly and dons clean, sanitary gloves — gloves are worn throughout the entire cleaning process
  • Verify employee is free of illness, open wounds, or conditions that could contaminate food contact surfaces
  • Confirm all cleaning supplies are on hand and in serviceable condition (see supply list below)
  • Check ingredient labels and expiration dates on all soft serve mix, toppings, and syrups — remove and discard any expired or improperly labeled product
  • Manually record the screen-displayed hopper temperature and compare to thermometer reading — if readings differ by more than 2°F, do not return to service until calibration is verified
  • Only use approved products for sanitization; follow the sanitizer manufacturer's instructions for preparing solution
  • Use only clean, potable water for all cleaning and sanitizing steps

Cleaning Supplies Required

Detergent
Stera-Sheen Green Label Sanitizer or equivalent food-equipment approved detergent at manufacturer-recommended concentration
Sanitizer
Stera-Sheen Green Label or approved equivalent — 1 oz per 2.5 gallons water (~200 ppm quat)
Test Strips
Quaternary ammonium test strips (200–400 ppm acceptable range) — verified BEFORE sanitizing
Lubricant
Food-grade lubricant (NSF H1 rated) — applied to all O-rings and moving parts after rinsing, before reassembly
Brushes
Brush kit: nylon-bristle tube brushes (assorted sizes), soft-bristle brush for larger surfaces, large brush for freezing cylinder and hopper interior
Equipment
Three-compartment sink, food-grade buckets (labeled), service cart, bus bucket for parts transport, thermometer, measuring pitcher, plastic O-ring removal tool, bar towels, sanitizing wipes, gloves
B

Drain Product & Initial Rinse

Note

This machine is hand-cleaned. A pre-cleaning circulation step is performed but does not replace manual disassembly and hand-washing of all components.

  • Set machine state to STOP.
  • Remove the rosette cap from the auger door and place it in the hopper.
  • If product is frozen, enable the Clean toggle and run 5 to 10 minutes to thaw, then return to STOP.
  • Purge the product: enable the Clean toggle, place an empty bucket under the dispensing spigot, raise the spigot to completely empty remaining soft serve mix, close the spigot, and remove the waste bucket. All drained mix must be discarded. No product salvage is allowed.
  • Rinse the system: fill the hopper with approximately 2 gallons of clean potable water. Enable the Clean toggle. Place a bucket under the spigot and raise it to flush residual mix. Clean the hopper sidewalls with brushes from the brush kit. Close spigot once fully drained and remove the waste bucket.
  • Repeat the rinse step using pre-mixed sanitized water.
C

Disassembly & O-Ring Removal

All O-rings and gaskets must be removed every cleaning cycle, no exceptions. These components cannot be adequately cleaned or inspected while installed.

Set machine to OFF. Place all disassembled components into a clean bus bucket for transport to the three-compartment sink. Remove the following components in order:

  • Unscrew the four corner screws and remove the Auger Door.
  • Remove the Large O-Ring and Dispensing Spigot from the Auger Door.
  • Remove all 3 O-Rings from the Dispensing Spigot. Use the plastic O-ring removal tool if needed. Do not use sharp implements that could nick the O-ring seating surface.
  • Pull the auger from inside the machine and remove the white gasket at the end of the auger.
  • Remove the Hopper Lid and Agitator Blade from the hopper.
  • Inspect every O-ring and gasket for cracks, nicks, flattening, or visible wear. Replace any damaged O-ring immediately. Do not reassemble with a compromised O-ring.
Hopper In-Place Cleaning

The hopper cannot be transported to the sink. After removing components, clean the hopper in-place as follows: (1) Wipe the inner walls of the hopper with a sanitizer solution using bar towels. (2) Scrub the inside of the freezing cylinder with the largest brush from the brush kit. (3) Wipe the inside of the freezing cylinder with a sanitizer solution. This step is performed in addition to the three-compartment sink cleaning of all removable components.

D

Hand Wash at Three-Compartment Sink

Transport all disassembled components to the three-compartment sink using a clean service cart. Prepare the sink before beginning:

Compartment 1 — Wash
Approved food-equipment detergent solution at manufacturer-recommended concentration; lukewarm wash water — do not exceed 110°F
Compartment 2 — Rinse
Clean potable water — completely removes all detergent residue
Compartment 3 — Sanitize
Stera-Sheen Green Label solution at 1 oz per 2.5 gallons (~200 ppm quat) — concentration verified with test strips BEFORE sanitizing
  • Wash each component in Compartment 1 using brushes from the brush kit to clean inside all tubes, bevels, O-ring channels, and other hard-to-reach areas.
  • Rinse each component in Compartment 2 with potable water. All detergent residue must be fully removed before proceeding.
  • Inspect each component. No visible residue, film, or product should remain. Re-wash if needed.
  • Before placing components into Compartment 3, use quaternary ammonium test strips to verify the sanitizer solution reads 200 to 400 ppm. Document this concentration reading on the cleaning log.
  • Sanitize each component in Compartment 3 with minimum 2-minute contact time.
  • Place sanitized components on a clean and sanitary surface or drying rack to air dry. Do not wipe dry.
E

Food-Grade Lubrication & Reassembly

Lubrication is required at every cleaning cycle. Apply food-grade lubricant (NSF H1 rated) before reassembly. Dry or inadequately lubricated O-rings cause premature wear and can crack, creating pathways for contamination.

  • After components have been washed, rinsed, and sanitized, and before reassembly, apply a pea-sized amount of food-grade lubricant to each orange O-ring using a clean gloved finger.
  • Apply lubricant to all other moving parts as specified in the manufacturer instructions.
  • Do not use petroleum-based greases. Only use NSF H1 rated food-grade lubricant approved in The Ordering Guide.
  • Set machine to OFF, then reassemble the soft serve machine by reversing the disassembly steps in Step C above.
  • Ensure all O-rings are fully seated in their grooves with no pinching or rolling.
F

In-Machine Sanitization Cycle

This step sanitizes the internal machine pathways (hopper and freezing cylinder) that cannot be submerged in the sink. It is performed after full reassembly.

  • Set machine to ON.
  • Attach the Agitator Blade to the Agitator Column.
  • Fill the hopper with 2 gallons of Stera-Sheen sanitizer solution.
  • Place an empty bucket under the dispensing spigot.
  • Enable the Clean toggle and clean the hopper sidewalls and underside of the hopper lid using brushes from the brush kit.
  • Allow the machine to run a minimum of 5 minutes with the Clean toggle enabled before purging.
  • Purge the sanitizer: raise dispensing spigot for 30 seconds, close for 1 minute, repeat until all sanitizer is fully purged, then remove the waste bucket.
  • Drain completely. Do not rinse the machine interior with water after this sanitization step.
G

Return to Service & Documentation

  • Enable the Refrigerate toggle. Product will be ready to serve in 8 to 10 minutes.
  • Manually dispense a few initial servings to verify product quality, consistency, and portion size before the kiosk goes live.
  • Verify machine temperature is within acceptable range: hopper 37 degrees F plus or minus 2 degrees, freezing cylinder 19 degrees F plus or minus 1 degree. Cross-check screen reading against thermometer and document any discrepancy.
  • Dispose of all waste product and used sanitizer solution in accordance with local health department regulations.
Process Flow

Pre-service check → Drain & rinse → Disassemble & remove O-rings → Hand clean (3-compartment sink) → Verify sanitizer concentration → Sanitize → Drain → Lubricate O-rings → Reassemble → In-machine sanitization cycle → Drain → Return to service → Document

G2

Consumable Loading Step-by-Step Guide

Important

Loading must only occur when the machine is clean, sanitized, and not actively serving an order.

1. Prepare the Machine

  • Open the kiosk service door.
  • Wash hands and wear food-safe gloves.
  • Confirm the machine is clean and sanitized.
  • Make sure the machine is not actively serving an order.

2. Load Ice Cream / Frozen Yogurt Mix

  • Open the upper mix hopper lid.
  • Pour prepared liquid soft-serve mix into the hopper.
  • Do not overfill.
  • Make sure the mix level stays above the low-level sensor.
  • Close the hopper lid.
  • On the touchscreen, turn Refrigeration ON.
  • Enter Manual Operation mode.
  • Run a short dispense/prime cycle until mix flows smoothly.
  • Stop dispensing.
  • Allow the machine to cool until the product reaches serving consistency.

3. Load Cups

  • Open the cup dispenser area.
  • Load cups into the cup tube.
  • Make sure cups are facing the correct direction.
  • Do not force cups into the tube.
  • Confirm cups are not warped, crushed, or stuck together.
  • Run a Cup Drop Test.
  • Confirm one cup drops cleanly.

4. Load Dry Toppings

  • Open the topping compartment.
  • Remove or open the dry topping bins.
  • Fill each bin with approved dry toppings.
  • Use toppings such as sprinkles, crushed cookies, crushed nuts, coconut, or cereal-style toppings.
  • Do not use sticky, wet, oversized, or clumped toppings.
  • Close each topping bin securely.
  • Run a topping dispense test.
  • Confirm each topping flows properly.

5. Load Syrups / Sauces

  • Open the liquid topping area.
  • Fill each sauce container with approved syrup or sauce.
  • Make sure the sauce is thin enough to pump properly.
  • Secure the container lids.
  • Prime the sauce lines if needed.
  • Run a liquid topping test.
  • Confirm each sauce dispenses smoothly.

6. Final Check Before Sales

  • Confirm mix is loaded and refrigeration is ON.
  • Confirm cups drop correctly.
  • Confirm toppings dispense correctly.
  • Confirm sauces dispense correctly.
  • Check that the robotic arm moves freely.
  • Run one full test order if possible.
  • Clean any spills.
  • Close and lock the service door.
  • Return the kiosk to customer sales mode.
H

Cleaning Frequency

Standard Interval

Standard cleaning interval: every 3 days. If product testing, inspection results, or regulatory guidance requires a more frequent schedule, the operator shall comply accordingly. Product may only be added to the soft serve machine within 12 hours of the machine completing a sanitization cycle.

In the event of any temperature fault, mechanical failure, or extended offline period, a full clean and sanitization cycle must be completed and the product restocked before returning to service.

I

Food Safety Cleaning Checklist

The following checklist must be completed and signed at the conclusion of each cleaning event. The logbook is kept inside the kiosk at all times and must be presented to health inspectors upon request. Records must be retained for at least one full calendar year.

99 SPOONS — CLEANING & FOOD SAFETY CHECKLIST

  • Hands washed thoroughly before starting
  • Clean, sanitary gloves worn throughout cleaning
  • No illness, open wounds, or conditions that could contaminate food contact surfaces
  • All soft serve mix labels checked — no expired or unlabeled product
  • All toppings and syrups checked — no expired or unlabeled product
  • Expired or compromised product removed and discarded
  • Product drained and discarded — no product salvage
  • System rinsed with clean potable water
  • Machine fully disassembled per SSOP
  • All O-rings and gaskets removed and inspected
  • Damaged O-rings replaced (note quantity below)
  • Hopper walls and freezing cylinder cleaned in-place with sanitizer solution and brushes
  • All removable components hand-washed at three-compartment sink (wash → rinse → sanitize)
  • Food-grade lubricant applied to all O-rings and moving parts before reassembly
  • Machine fully reassembled
  • In-machine sanitization cycle completed (2 gallons sanitizer, minimum 5 min Clean cycle, fully purged)
  • Waste product and used sanitizer disposed per local health department requirements
  • Machine returned to Refrigerate mode — test servings dispensed and verified before going live

Cleaning records are retained on-site inside the kiosk logbook for a minimum of one full calendar year or as otherwise required by the local health authority (Section 7.6 of the 99 Spoons Operator's Manual). The logbook must be presented to health inspectors upon request.

Regulatory Access

Regulatory Sampling Access

Direct Sampling by Health Authorities

Authorized health department personnel may obtain product samples directly from any kiosk at any time.

Inspection Access Codes

99 Spoons issues dedicated inspection access codes to authorized personnel, enabling direct product dispensing from the machine for sampling or laboratory testing. If additional access assistance is needed, the responsible operator will provide support to regulatory personnel upon request.

Ingredient & Mix Storage

Ingredient and Mix Storage

Storage of food ingredients and consumables is managed by the kiosk operator in coordination with the host location.

Host-Provided Storage

Host locations designate areas for dry or liquid mix, toppings, sauces, cups, and disposable service items.

FIFO Rotation

Operators apply First-In-First-Out inventory protocols to maintain product freshness and ensure traceability at all times.

Chemical Segregation

Food ingredients are stored separately from cleaning chemicals and all non-food materials in accordance with food safety standards.

Facility Standards

Facility and Consumable Storage Standards

Host locations must provide clean, designated storage meeting standard foodservice conditions:

  • Off-Floor Shelving

    Shelving that keeps products off the floor.

  • Contamination Protection

    Protection from contamination sources and pest-controlled environments.

  • Chemical Segregation

    Strict segregation of food products from sanitation chemicals.

These requirements are formally documented within the 99 Spoons Host Location Use Agreement.

Wash Facilities

Access to Wash Facilities

All host locations provide access to appropriate wash facilities used to clean removable food-contact components.

  • Three-Compartment Sink

    Required for wash, rinse, and sanitize steps on all removable components.

  • Dedicated Handwashing Station

    Separate station available to all servicing personnel during sanitation procedures.

  • Potable Water Supply

    Safe, municipally supplied water for all cleaning, rinsing, and sanitation applications.

Deployment Transparency

Jurisdictional Disclosure

Operators provide the applicable health department with the number and addresses of all kiosk installations within each jurisdiction, ensuring full regulatory visibility and supporting proactive inspection scheduling.

Operational Responsibility and Host Agreements

Operational Responsibility and Host Agreements

Each installation operates under a designated responsible operator who oversees all sanitation, maintenance, and compliance activities.

Sanitation Execution
Log Maintenance
Regulatory Coordination

Host Location Use Agreement

All host properties execute a formal agreement acknowledging:

  • Health department inspection access
  • Availability of electrical utilities
  • Designated consumable storage space
  • Access to required wash facilities

Operator contact information — name, phone, and email — is provided to the applicable health department.

Compliance Commitment

Compliance Commitment Summary

The 99 Spoons system is designed for regulatory confidence at every level — from certified equipment and documented sanitation cycles to transparent deployment and responsive operator engagement.

NSF/ANSI-25 Certified

Independently verified by Intertek.

72-Hour Sanitation Cycles

Documented logs maintained at every site.

TARS Monitoring

Continuous temperature and operational telemetry.

Formal Host Agreements

All sites bound by the Host Location Use Agreement.


Approved Products

Approved Non-Dairy Mix Suppliers

99 Spoons sources exclusively from approved non-dairy suppliers meeting quality, safety, and regulatory standards for frozen dessert products.

VeganDairy-Free15 Flavors

YoCream Sorbets

15 sorbet flavors, vegan and dairy-free. Meets strict food safety and allergen requirements for non-dairy frozen dessert programs.

yocream.com →
Zero DairyVegan

Aussie Blends Vegan Soft Serve Mix

Plant-based soft serve mix with zero dairy. Designed for automated soft serve kiosks with consistent texture and flavor.

aussieblends.com →
Plant-BasedTop-8 Allergen Free

Eclipse Foods Plant-Based Soft Serve

Cassava and corn base. Free from nuts, soy, oats, and coconut. Full allergen-free profile for inclusive service environments.

eclipsefoods.com →
Oat Milk BaseNon-Dairy

Rich's Oat Milk Soft Serve Base

Oat milk-based soft serve for operators seeking a creamy non-dairy alternative with broad consumer appeal.

richsusa.com →
Shelf-StableNational Distribution

Frostline Non-Dairy

Shelf-stable powder format with national distribution. Easy to source, store, and restock at any location.

frostlinefrozentreats.com/products →
Coconut Oil BaseNon-Dairy

Hanan Products Sunrise Supreme

Coconut oil-based non-dairy soft serve. Rich texture, reliable performance in automated dispensing equipment.

hananproducts.com →
Kosher CertifiedGluten FreeJust-Add-Water100+ Flavors

Frocup Vegan Non-Dairy Neutral (Vanilla)

Just-add-water format. Sweetened with natural fructose and stevia. Kosher certified, gluten free, compatible with 100+ flavor additions.

frocup.com →

Supporting Documentation

Operator Documents

All four documents are displayed below for immediate review. A health inspector can read every form, checklist, and procedure directly on this page. Download links are provided at the bottom of each document.

Document 1 — Facilities Use Agreement

99 Innovations LLC · Rev 08.25/sb · Host Location Acknowledgment

Download PDF

I certify that the above listed location has an active permit issued by the county/state.

I agree to provide the following access to Operator in order to operate a 99 Spoons soft serve vending kiosk at our facility:

  • 3 Compartment Sink for Ware Washing
  • Approved Water Supply
  • Handwashing Station
  • Waste Water Disposal Site
  • Dry Food Storage
  • Location to Prepare Food

Document 2 — Kiosk Onboarding Guide

Pre-Installation Checklist & Opening Inventory · Rev 1.0

Download PDF

Complete each item below before your installation date. Contact your 99 Spoons representative with any questions.

  • Electrical — Confirm that the kiosk has access to a 120V / 25-amp grounded outlet on a dedicated circuit. Circuit must be able to maintain at least 105V under load.
  • Doorways — Confirm that all doorways are wide enough to accommodate delivery. Kiosk dimensions: 38.7" W × 36.6" D × 76.4" H.
  • Placement — Ensure the kiosk will be placed indoors and away from any heat sources.
  • Pathway — Ensure the area between the loading dock and installation area is free of obstacles. Confirm flooring is reasonably level with no stairs on the route. If applicable, ensure elevators can accommodate the kiosk. Approximate shipping weight: 975 lbs.
  • Ventilation & Clearance — Ensure there is 6" of space behind the kiosk for adequate airflow. Ensure there is 36" of clearance in front of the kiosk to allow the door to fully open.
  • Connectivity — Obtain and verify the SSID and Wi-Fi password at the location. Kiosk requires a signal on the 2.4 GHz band.
  • Water Access — Confirm availability of a 3-compartment sink, approved water supply, handwashing station, and waste water disposal on-site.
  • Storage — Identify dry storage space for consumables and supplies near the kiosk location.
  • Permits — Confirm that the host facility has an active health permit and that the operator contact information has been provided to the applicable health department.
  • Signed Agreement — Ensure the Facilities Use Agreement has been signed and is on file with 99 Innovations LLC.
ItemWhen to Order
Soft Serve / Acai / Froyo Mix14 days prior to installation
Syrups14 days prior to installation
Toppings14 days prior to installation
Supplies21 days prior to installation
ItemQuantity
Food Grade Buckets 3 Gallon(1) 3-pack
Microfiber Cleaning Cloth(1) 24-pack
Brush Set(1)
Sanitizer Test Strips(1) 100-pack
SteraSheen Green Label Sanitizer Packets(1) 100-pack
SteraSheen Food Grade Machine Lubricant(1) 4-pack
Nitrile Food Safe Gloves(1) 100-pack
Polycarbonate O-Ring Removal Tool(1) 2-pack
Low Temp Thermometer(1)
4000 mL Measuring Pitcher(1)
Sanitizing Wipes(1) 120-pack
Hand Vac(1)
30 Gallon Trash Bags(1) 50-pack
Spray Bottles(1) 4-pack
18-inch Whisk(1)
Volt Meter(1)
8GB Flash Drive(1)
Digital Scale(1)
ItemOpening Order Quantity
Premium Vanilla Mix (use promo code ORDER99 for 12.5% discount)(4) cases
Frozen Yogurt Liquid Mix(10) cases
Frozen Yogurt Powder Mix(3) cases
Sprinkles(1) 20 lb. case
Mini M&M's(1) 25 lb. case
Crushed Oreos(1) 35 lb. case
Hershey's Syrups (Chocolate, Strawberry & Caramel)(3) Variety Packs

Document 3 — Kiosk Operations Log

Standardized service visit record · Rev 1.26/sb

Download PDF

Each service visit must be recorded by the technician. Logs are kept in the machine and available for inspection.

DateTime InTime OutServices PerformedTechnician

Document 4 — Operator's Manual — B83 Series

Key procedures: Machine overview · Cleaning · Safety · Troubleshooting

Download Full Manual PDF

Environmental Requirements

  • Temperature: 20°C–32°C (68°F–90°F)
  • Keep dry — no rain, direct sunlight, or outdoor use
  • Never run with an empty hopper
  • Power: AC 110V / 60Hz, 14AWG grounded cord

Machine Parameters

  • Voltage / Frequency: 110V / 60Hz
  • Power Consumption: 1,700W
  • Operating Temp: 20°C–32°C
  • Humidity: 20%–70% non-condensing
  • Series: B83 (Intertek ETL / NSF-25 certified)

Initial Setup

  • Allow 24 hrs standing time after delivery before powering on
  • 20 cm clearance on all sides required
  • Install Wi-Fi antenna before first power-on
  • Flat, stable, solid floor surface required

A trained cleaner must clean the machine every 3 days (or more frequently as required by the local health department). All cleaning must be logged.

  • Turn off cooling via the small touch screen
  • Pull out overflow pipe seat; check for foreign matter in hopper
  • Place bucket under dispenser door → Dispensing On → drain residuals → Dispensing Off
  • Clean with warm water ~55°C (×2): fill hopper 2/3 → Clean 4–5 min → drain → repeat
  • Disinfect with Stera Sheen (3 packs in 6 gal water) — fill 2/3 hopper → Clean 4–5 min → drain → repeat (×2)
  • Disassemble dispenser door: unscrew 4 bolts, remove beater and piston
  • Soak all parts in disinfectant for 60 minutes, then rinse and dry completely
  • Lubricate piston with edible lubricating grease before reinstalling
  • Reinstall all parts → power on → run final 60-minute disinfectant clean cycle
  • Scan code and test 3–5 cups to confirm normal operation before reopening for sales

Daily Checks

  • Keep machine surface clean
  • Verify refrigeration is working properly
  • Buy a cup yourself to confirm machine performance
  • After cup shortage: click "Unprotect" to re-enable
  • Clean condenser dust regularly
  • Check guide rail and robotic arm for debris

Monthly Checks

  • Check for oil/mix leakage
  • Clean overflow pipeline
  • Check tightness of driving motor belt
  • Check lubrication of door lock, gears, mechanical parts
  • Check fasteners for looseness
  • Test circuit control board (annual full check required)

Safety Rules

  • Never look directly at the sterilization (UV) lamp
  • Always unplug before maintenance or part replacement
  • No-load refrigeration is strictly prohibited
  • Do not use toppings with large pulp or fruit stone
  • Do not use powder toppings or high-sugar-content toppings
  • Discard mix that has gone bad — never sell
IssueCommon CauseAction
No jam / topping dispensed Jam out, nozzle blocked, or motor wire disconnected Refill jam; clear blockage; manually test motors in settings
Cup dropper stuck Cups too tight, cup tube gap too large, or sticky cups Manually test 3–5 times; rotate cup tube; ensure cups are not sticky
Compressor overheat protection Poor heat dissipation, low voltage, blocked condenser Ensure 30 cm wall clearance; clean condenser; check voltage 100–125V
Low ice cream percentage Hardness too high, insufficient mix, low voltage Lower hardness setting; add mix; use voltage stabilizer if needed
"Material shortage" on screen Hopper empty or floating ball stuck Add mix; manually move float to test; clean during next cleaning cycle
Mix goes bad quickly Refrigeration not turned on after filling Always open refrigeration/pre-cooling immediately after filling hopper
Abnormal noise in scraper frame Crystal seat misaligned or cover missing Re-adjust crystal seat; confirm cover is installed